top layer, top face 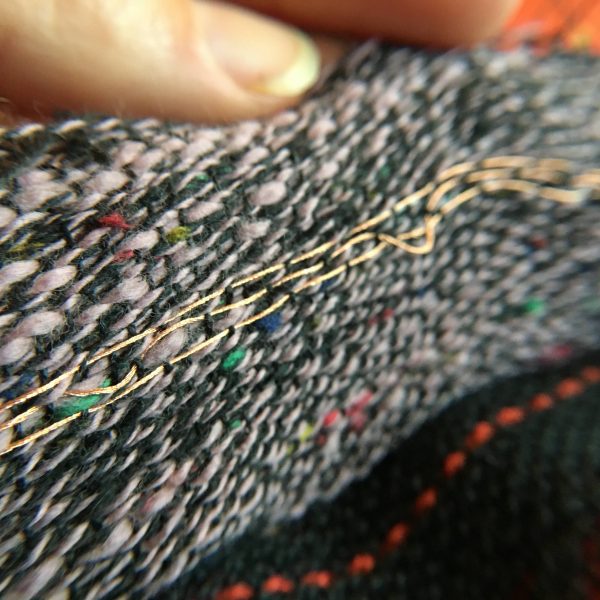
top layer, bottom face 
middle layer, top face 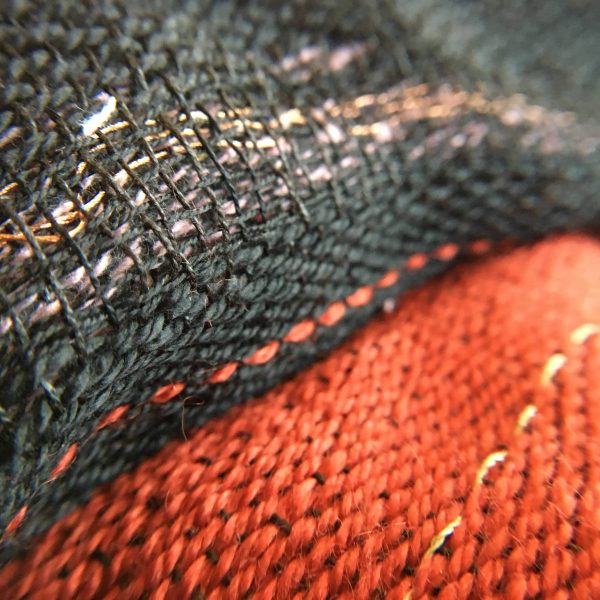
middle layer, bottom face 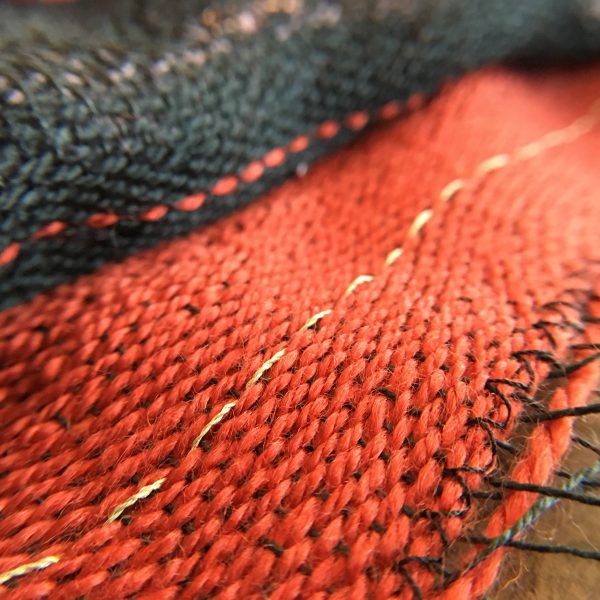
bottom layer, top face 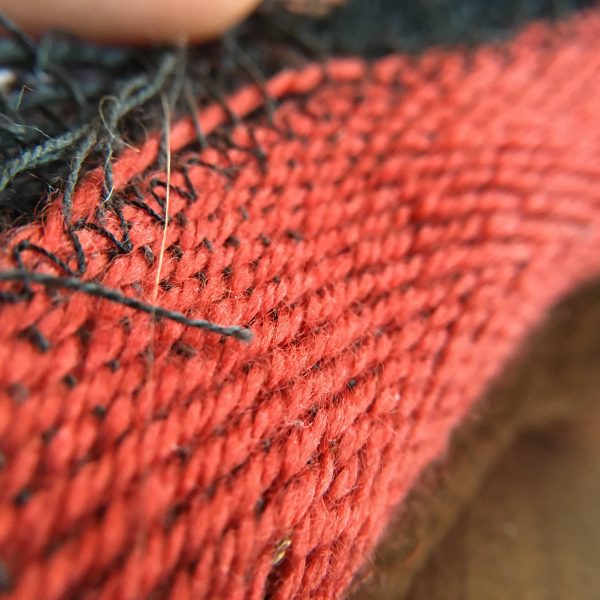
bottom layer, bottom face 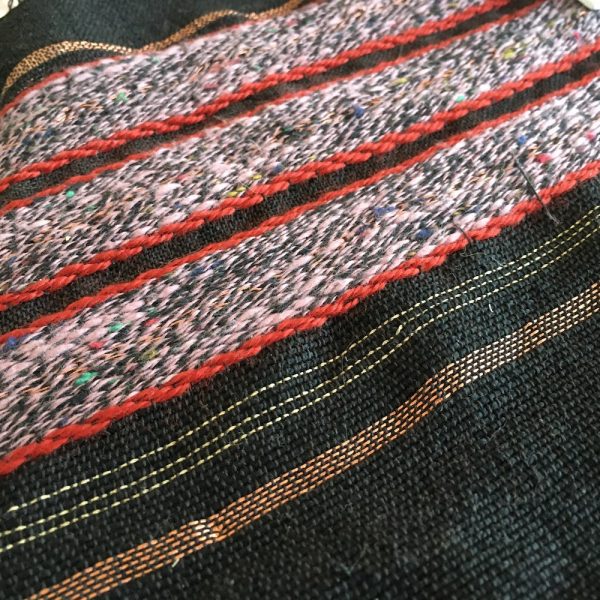
multiple sensing rows 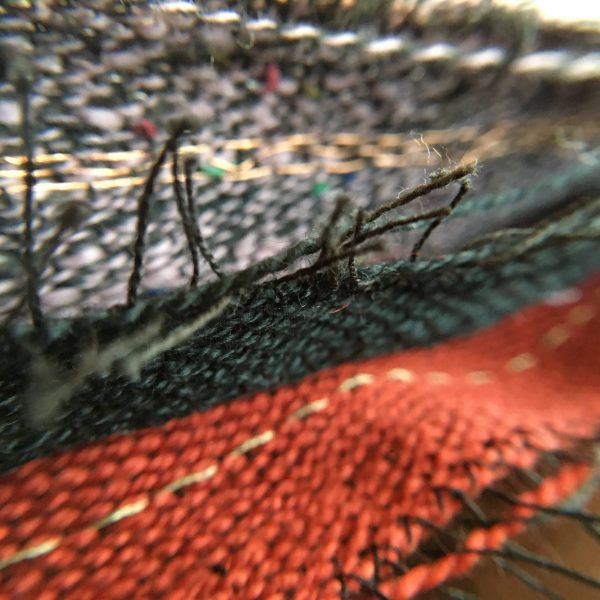
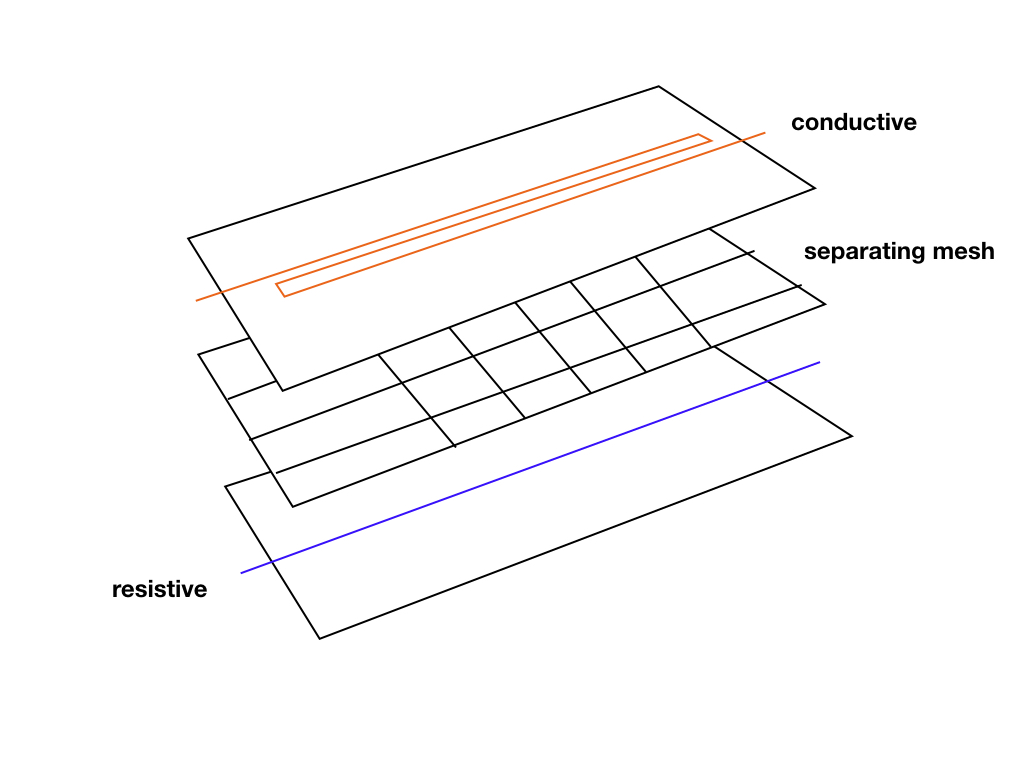
cutaway of all three layers
A 2D position sensor designed for ease in scaling to large surfaces and/or irregular surfaces. Each sensing row uses a triple woven structure to separate conductive and resistive traces. After weaving, the fabric can be cut and the rows can be connected by hand, allowing for rough 2D position sensing on a single output.
The swatch leveraged multi-layer weaving, specifically triple weaving (where three layers are woven simultaneously) to create resistive, spacer, and conductive layers. Pressure causes the resistive and conductive layers to touch. Because a single resistive yarn winds continuously over the surface, the resistance change can be mapped to a position along the thread, and thus, a particular point on the 2D surface. Furthermore, I wove. in power and ground traces, as well as a voltage divider, so that the fabric can easily connect to power, ground, and any analog port on a micro-controller.
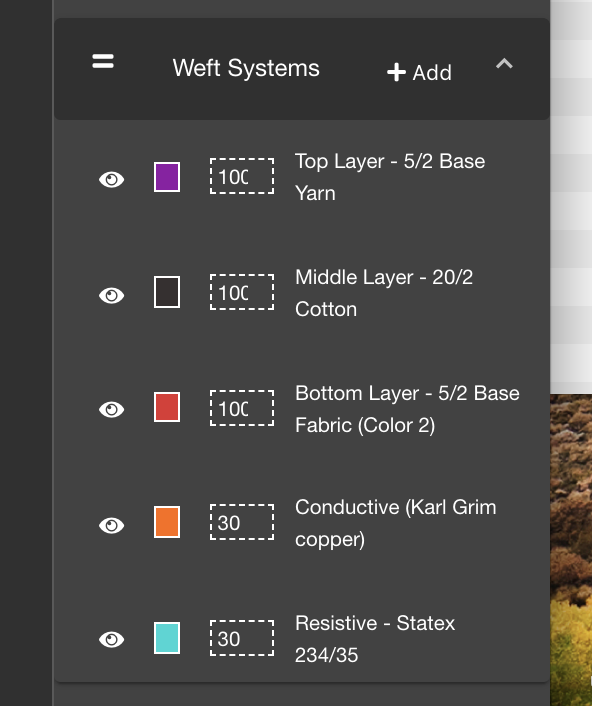
Materials // Base Yarns – 2 colors of 5/2 non-conductive yarns, one color 20/2 non-conductive, karl grimm conductive copper, statex 234/35 resistive yarn.
Tools // TC2 Digital Jacquard Loom, hands for sewing/mending traces, AdaCAD and Photoshop for software.
Techniques // Triple Weaving, Supplemental Wefts, Using Twills for Shaping
Limitations // this current iteration needs quite a bit of force to make a connection. I found it worked best when I walked across the surface. Because I prioritized feasibility for sensing when cut and reassembled and for a single output, the sensor as described can only produce one reading at a time. For instance, it will tell you the point of contact that is closet to the power rail. One could resolve this by connecting each stripe to is own analog sensor. but they may also need to modify the file to include additional voltage dividers and likely would need to reorient the power rail such that is runs along the warp (and allows each sensor to be connected in parallel).
Technical Concept
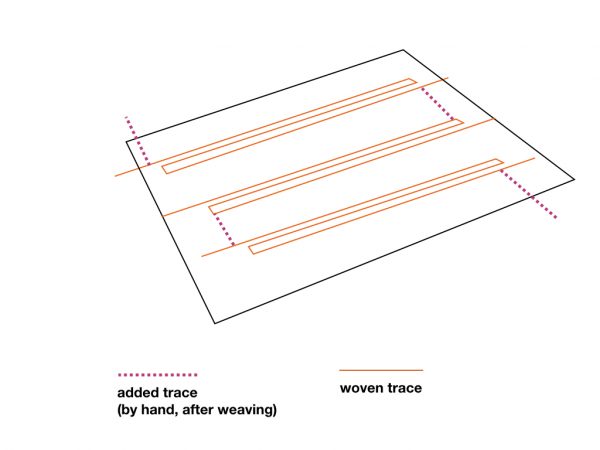
Each “stripe” in the pattern above is created through triple weaving. Each layer in the structure serves a different function. You can expand the sensing area by weaving additional stripes.
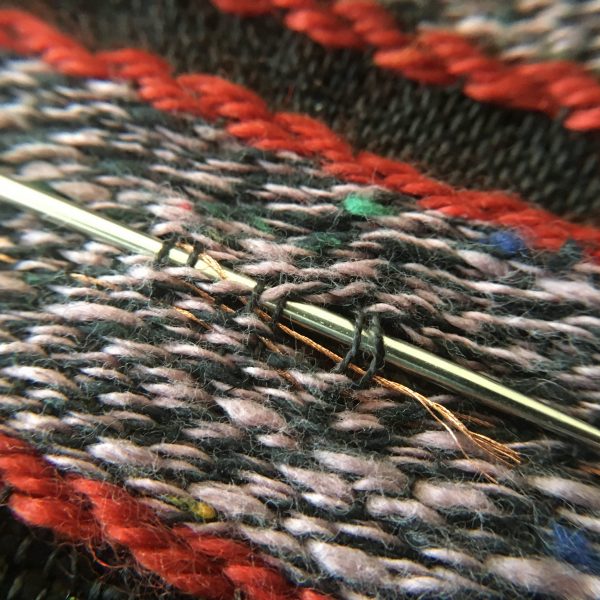
When working with multiple stripes, you must make them continuous by adding vertical traces by hand. I do this by leaving long ends and then using a tapestry needle to weave the end through the fabric and into the same pic as the previous row
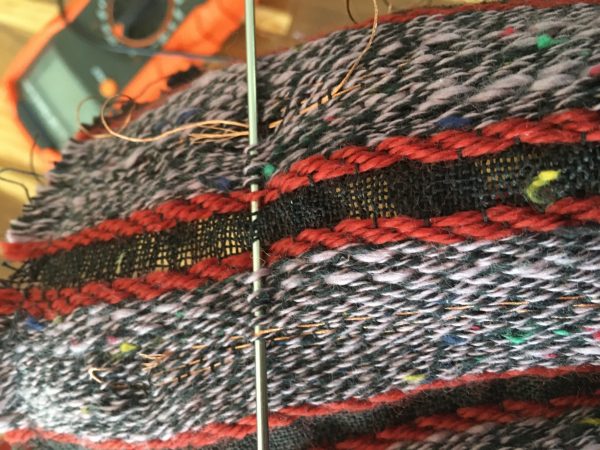
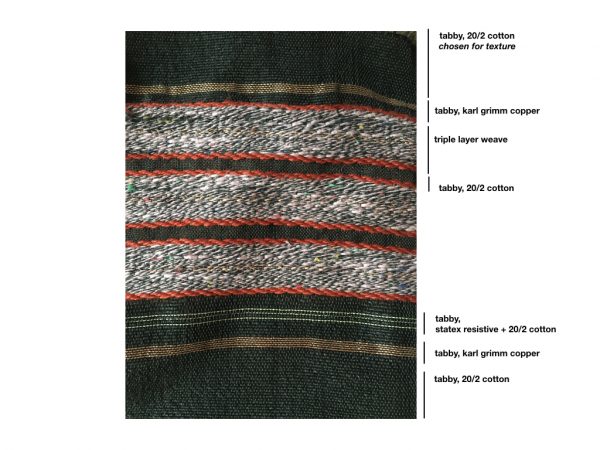
I weave sections of tabby between the rows to give the fabric additional structure as well as a kind of sheer quality to contrast the thicker layers.
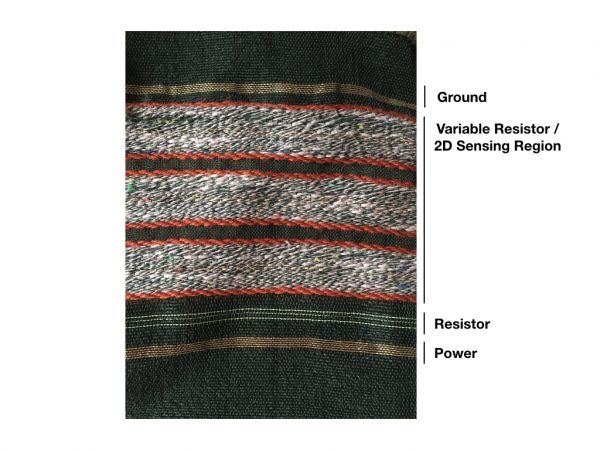
By weaving tabby with copper before and after the stripes, I made larger traces for power and ground. I then weave a length of resistive yarn (equal in rows to the number of stripes) between the stripes and the ground rail. This acts as a in-series resistor. By adding an output between the resistive section and the stripes, I have essentially integrated the voltage divider. That output can be hooked directly to an analog port on a microcontroller for measuring.
Woven Structure Description
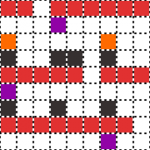
full draft (repeats along width) 
key, mapping colors to yarn types

The images above contain the entire draft that is color coded to show which yarn is thrown at each pic. This draft shows only the multilayered sensor region.
To explain the structure of the three layers, I have split them into three different views.
The leftmost shows only the pics that make up the bottom layer. Two kinds of yarns are used, a base yarn and a single resistive yarn. The pattern of the twills was intended to make the layer “bow” outward, keeping the traces separated when unpressed. Also, where the overall pattern takes the form of a weft facing twill, I flipped the pattern of the trace to be warp facing. This causes the conductive trace to sit on the top side of the bottom layer, and to remain almost invisible on the outside.
The middle layer reveals how the shuttle is only thrown once every three pics. This gives this layer an open mesh structure, allowing it to separate when not being touched but open enough to allow for a touch when pressed. Thank you to Adrian Freed who gave me this tip about 10 years ago, before I ever realized I’d need it in the future.
The top layer (right most) is a mirror image of the bottom, and also inverted at the very top and bottom (which is how we get those subtle borders). The conductive trace is thrown in the center of the pattern on three rows, just to give it a bit more surface area for pressing. Again, I flipped from a weft to warp facing twill along the conductive trace to cause the trace to sit on the under, or bottom side of the top layer. This places more of the surface in the sensing region but, because there are three layers, it is largely visible within the structure.
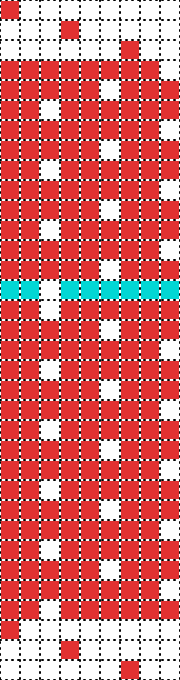
detail of bottom layer 
detail of mid layer 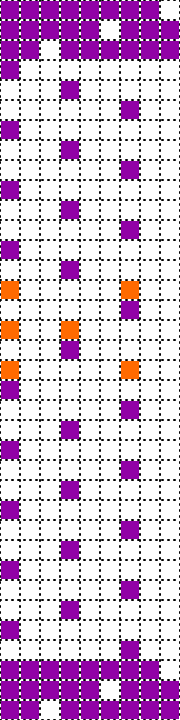
detail of top layer
This project was conceived, designed and woven by Laura Devendorf with inspiration, as always, from kobakant
Variations
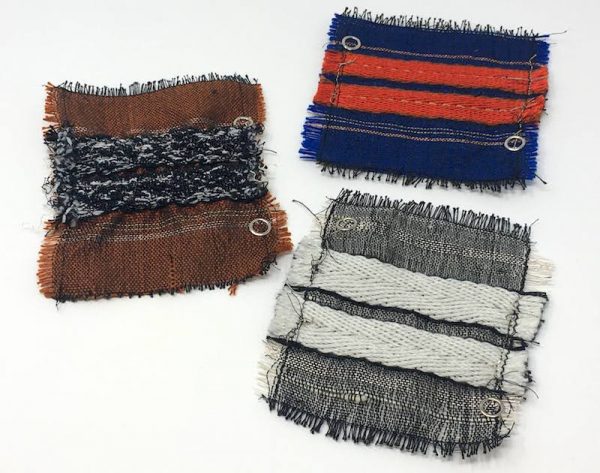
In prepping 20 of these swatches for the 2020 E-textiles swatch exchange I was able to experiment with some new materials in the same structure. Producing multiples proved challenging and rather than hand mending traces together, I used my sewing machine with conductive thread in the bobbin to connect regions together. This still required a little bit of hand knotting to make a firm connection.
Best Performance
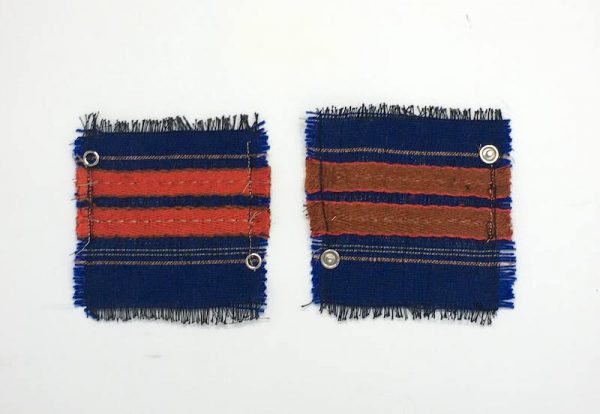
This swatch used 5/2 tencel (blue, gold) and cotton (red). I belive the uniformity of their yarn sizes, and their size ratios to the conductive elements, make this structure and material combination perform the best in terms of accurate readings.
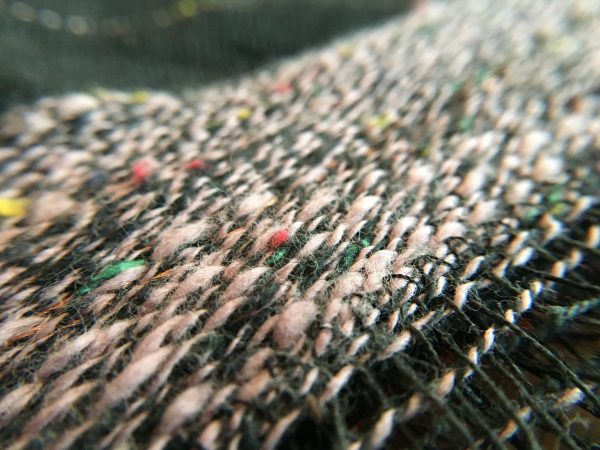
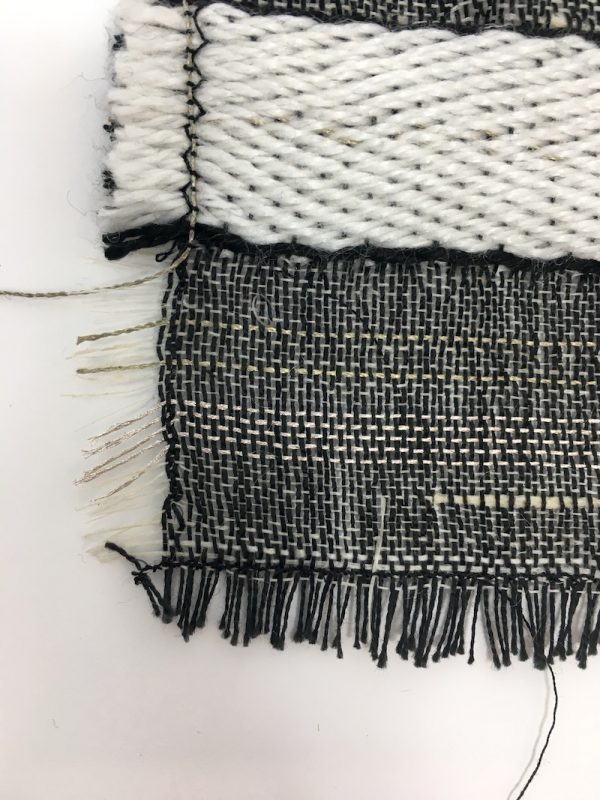
Most Visually Interesting

This swatch was made with akagi silk in the ground, and black and white tencel wool blend in the rows. This was my first swatch after a long break and I misinterpreted the pattern a bit (I accidentally swapped the conductive and resistive sides and might have thrown them in the wrong pic). As a result, it didn’t work very well, as the traces that were meant to touch became push towards the outside of the rows (instead of the inside). Nonetheless, the texture silk gives it a nice meshy ground the the conductive yarns look pretty against it.
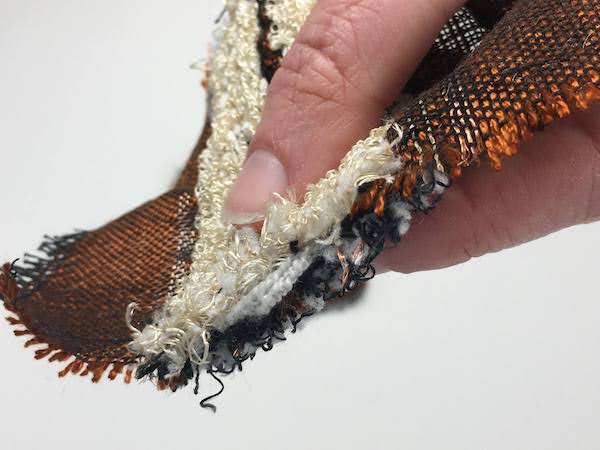
Happy Accident
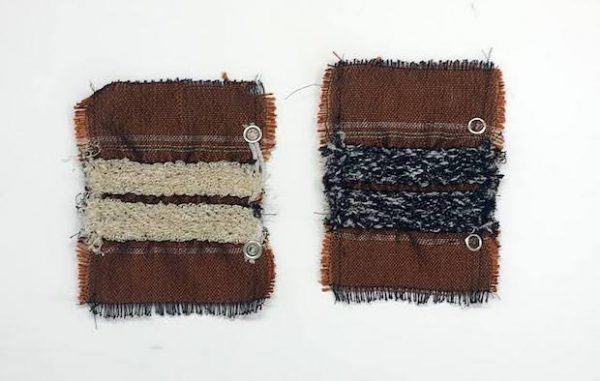
In this swatch, I used a copper 5/2 tencel base yarn and wove the yarns with black and white versions of a boucle yarn offered by Bart & Francis. The boucle has some stretch and I wanted to see if the stretch would make the rows “puff” away from each-other more. They did, and you can see where the make the fabric pucker a bit, but they were also so thick that the conductive regions could not make contact with each other on press. To remedy this, I cut a long strand of silver-spun wool yarn and threaded it back and forth between the tunnels. This make it much more reactive to touch and, overall, much easier to assemble that the other variations.